
4 hands, 2 weeks, 1 set of blueprints equals…..Robbie!
Robbie is a Chameleon nesting dinghy designed by Danny Greene of Offshore Designs. If you’re interested in plans, he can be reached at dtgreene@ibl.bm.
- LOA: 10’4″
- stern: 5’4″
- bow: 5′
- beam: 4′
- total weight: 110 lbs
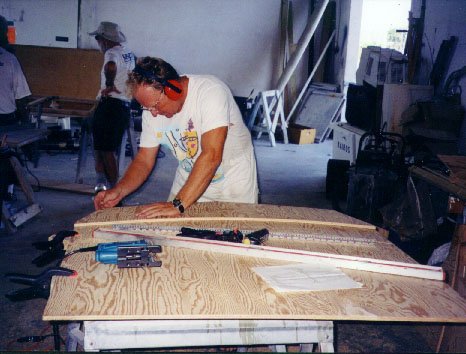
We read the instructions thoroughly first and studied the patterns, I mean blueprints. There were a couple of points that were fuzzy so we decided to do a test run. We got a lot of cardboard (break down boxes and duct tape them together) and we carefully cut the pieces out. Then we put our cardboard mockup together. This enabled us to work out all the details and for me to fully understand the construction process. It’s better to screw up in cardboard than wood. When cardboard Robbie was fully duct taped together, we invited friends over for drinks in “the boat”.
Robbie is an example of “stitch and glue” construction. OK, so I’m not a carpenter but I do sew and this I can relate to. You cut out the pieces, stitch them together with wire, and once the form is made, just fiberglass the whole thing. Easy!
 |
Measure twice, cut once. |
 |
The plans called for us to “stitch” the pieces together with copper wire. Once the form is stitched together, you fiberglass inside and out, then cut off any wire sticking out. Instead of copper wire, we used plastic cable ties. Cheap, fast (pretty too!) when we cut them off there’s no bits of metal in the boat to rust. |
 |
We cut costs here by using cheap boatyard resin on the inside instead of West System Epoxy.
Lessons learnt with epoxy:
|
 |
Oh boy! The bow takes shape! Yes making a nesting dinghy is essentially building 2 boats. We built the stern first, fiberglassed it, and while that was drying we got going on the bow section. |
 |
There’s a lot of curve to the bow. It took 2 days to bend it into shape. |
 |
Once the basic hulls are done, the extras come in. Aren’t those buoyancy tanks beautiful?
Tip: find a flea market or dollar store to buy plastic fillet tools. Look in the kitchen section for icing tools, way cheaper. |
 |
The Pirate Guy added a few extras. There’s an added cross brace here for strength and ledges for the foredeck to sit on. The foredeck provides a really large bow locker that’s watertight. The plans include a hatch you can make. We’re opting for a watertight screw in hatchcover from West Marine. Just think, dry clothes when you reach shore! |
 |
Nice knees baby!
The knees are the curved insts, they’re handy for picking the boat up. Again, some changes. the Pirate Guy made the knees flush with the gunwales for a smoother line. |
 |
Robbie in all his nested glory. |
 |
It fits!
Another change – we built a single skeg instead of the 2 in the plans. |
 |

Still to be done:
- faring and painting the hull white
- painting the interior. Debate ranges between safety orange, lime green, or bright blue
- add the seat bracket. The seat is a longitudinal seat that drops into place. It goes from the transom to the bulkhead
- add a metal transom plate for the outboard. Robbie is rated for a 4 hp
- add the hatch cover to the bow locker
- fiberglass in a couple of D rings so we can lock the boat. Remember, ALWAYS lock your dinghy if you’re not in it
The version of the Chameleon is the simplest one. You can build a sailing version, with a centreboard trunk in the bow between the bulkhead and the bow locker and a mast step. Or there’s the rowing version with a sliding seat. I think we’ll convert to the sailing version….
Stay tuned!
Why the name Robbie? Didn’t you see the movie Forbidden Planet, with Robbie the Robot?
Great description of the build. Thank you. I look forward to seeing the nesting part in operation. Most nesting designs are demonstrated in flat water which is probably the most likely conditions for smaller boats. The Chameleon design is large enough to use is less calm conditions so I look forward to seeing how it can be joined together in lumpy water, when you get to it!
All the best,
Christopher
Australia
That’s a nice build. Did the Chameleon plans come with the option to build the halves separately? Or did you have to calculate it from the plans?
I’m curious because if you can build the halves separately you don’t have to scarf plywood to make sections longer than 8′.
In the plans, you don’t have to scarf the halves.. they’re butt-jointed together with butt blocks. The plans don’t cover building in two halves.
Building in two separate halves is a technique I haven’t seen done before with a Chameleon. Interesting idea.
Great description and illustration of the build, and I like that you pointed out deviations from the plans,’ especially with the knees. They look refined they way you did them. Came to your web site through a link on the chameleon page, so your’s must be a highly regarded example. I’d love to see finished pics and which of the cheerful colors you used for the interior. May you have calm seas and steady breeze always. Be well,
Alvin
SoCal